本系列文章适用于前端开发初学者,我将从环境搭建开始,逐步介绍如何开发一个基于 Vue 3.x & Ant Design Vue 4.x 的网站,如果哪位朋友发现其中存在技术错误或其他不当之处,请及时指出,如果有任何疑问或需要帮助,也可以在评论区留言,我将尽我所能一一解答,谢谢。
本篇文章将在上一篇文章的基础上介绍如何将标准初始化项目改造为自定义初始化项目,主要包括以下内容:
- 关闭 eslint-loader 检查
- 增加 @ 配置
- 修改网站标题与关键词等内容
- 设置页面整体为上中下布局
- 使用 vue-router 实现路由
关闭 eslint-loader 检查
ESLint 是一个代码检查工具,用来检查代码是否符合指定的规范,由于默认的规则太过令人抓狂,所以首先我先把它关掉,高手们请忽略这一步。
在 vue.config.js 文件中增加以下代码即可关闭检查:
...
module.exports = defineConfig({
    ...
    // 是否在保存的时候使用eslint-loader进行检查
    lintOnSave: false,
    ...
});
增加 @ 配置
项目中文件间相互引用时会用到相对路径或绝对路径,如果目录结构比较深或目录结构变化,经常会出现问题,我们通常可以将 src 目录通过设置别名为 @ 目录,这样引入文件时候可以一目了然,而且编辑器一般会有提示,能提高开发效率并且尽量避免错误。
在 vue.config.js 文件中增加以下代码即可增加 @ 配置:
...
const path = require('path');
...
module.exports = defineConfig({
    ...
    // 接收被解析的配置作为参数
    configureWebpack: {
        resolve: {
            alias: {
                '@': path.resolve(__dirname, 'src')
            }
        }
    },
    ...
});
修改网站标题与关键词等内容
修改标题的方法有很多,我这里选择在 vue.config.js 文件中设置 chainWebpack 来修改。
在 vue.config.js 文件中增加以下代码,设置标题与关键词等内容:
...
module.exports = defineConfig({
    ...
    // 修改标题
    chainWebpack: config => {
        config.plugin('html').tap(
            args => {
                args[0].title = "三国史诗馆";
                args[0].keywords = "三国演义,三国人物,三国文化,历史资料,文化解读,人物传记,战役分析";
                args[0].description = "以《三国演义》为蓝本,专注于英雄人物与诗词歌赋,展现那段史诗般的历史长卷,带您领略那段波澜壮阔的历史风云。";
                return args;
            }
        );
    },
    ...
});
在 public/index.html 文件中增加以下代码:
<head>
    ...
    <meta name="keywords" content="<%= htmlWebpackPlugin.options.keywords %>">
    <meta name="description" content="<%= htmlWebpackPlugin.options.description %>">
    ...
</head>
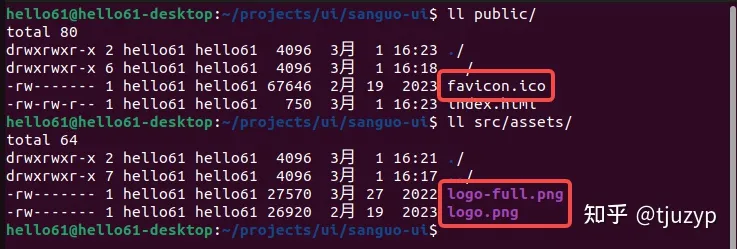
修改 src/assets/logo.png 与 public/favicon.ico 图片,新增 src/assets/logo-full.png 图片,如下图所示:

设置页面整体为上中下布局
增加 src/layout/*.vue 文件:
- index.vue
<template>
    <a-layout style="min-height: 100vh;">
        <a-layout-header class="clear-fix" style="background-color: white">
            <page-header/>
        </a-layout-header>
        <a-layout-content style="padding: 0 50px">
            <component :is="getRoute"/>
        </a-layout-content>
        <a-layout-footer style="text-align: center">
            <page-footer/>
        </a-layout-footer>
    </a-layout>
</template>

<script>
    import {computed, defineComponent} from 'vue';
    import {useRoute} from 'vue-router';
    import PageHeader from '@/layout/page-header.vue';
    import PageFooter from '@/layout/page-footer.vue';

    export default defineComponent({
        components: {
            PageHeader,
            PageFooter
        },
        setup() {
            const route = useRoute();

            const getRoute = computed(() => {
                return route.matched[route.matched.length - 1]?.components?.default;
            });

            return {
                getRoute
            }
        }
    });
</script>

<style scoped></style>
- page-header.vue
<template>
    <page-header-logo/>
</template>

<script>
    import {defineComponent} from 'vue';
    import PageHeaderLogo from './page-header-logo.vue';

    export default defineComponent({
        components: {
            PageHeaderLogo
        }
    });
</script>

<style scoped></style>
- page-header-logo.vue
<template>
    <div class="logo">
        <a id="logo" href="/index">
            <img src="@/assets/logo-full.png"/>
        </a>
    </div>
</template>

<script></script>

<style scoped>
    .logo {
        float: left;
        height: 64px;
    }

    #logo img {
        position: relative;
        top: 6px;
        height: 52px;
    }
</style>
- page-footer.vue
<template>
    <span>Copyright © <a href="http://www.sanguo.fun/" target="_blank">http://www.sanguo.fun/</a> All Rights Reserved. 备案号:<a href="http://beian.miit.gov.cn/" target="_blank">津ICP备2021007159号-2</a></span>
</template>

<script></script>

<style scoped></style>
使用 vue-router 实现路由
执行下方命令,安装 vue-router 组件:
# 安装 vue-router 组件
npm install vue-router --save
操作截图如下:
增加 src/views/index.vue 文件:
<template>
    <a-layout style="min-height: calc(100vh - 64px - 70px); padding-top: 36px;">
        <p>欢迎您的访问</p>
    </a-layout>
</template>

<script></script>

<style scoped></style>
增加 src/router/index.js 文件:
import {createRouter, createWebHistory} from 'vue-router';

import Layout from '@/layout/index.vue';

const routes = [
    {
        path: '/index',
        meta: {
            title: '平台首页',
            icon: 'HomeOutlined',
            key: 'index'
        },
        component: Layout,
        children: [
            {
                path: '',
                component: () => import('@/views/index.vue')
            }
        ]
    },
    // 首页跳转index
    {
        path: '/:lang(.*)',
        redirect: '/index'
    }
];

export default createRouter({
    history: createWebHistory(),
    fallback: false,
    routes,
    scrollBehavior: to => {
        if (to.hash) {
            return {el: to.hash, top: 80, behavior: 'auto'};
        }
    }
});
在 main.js 文件中增加以下代码引入路由:
...
// 引入路由
import router from './router';
...
// 使用路由
app.use(router);
...
修改 App.vue 文件为以下代码,使用路由:
<template>
    <router-view/>
</template>

<script></script>

<style>
    body {
        margin: 0;
    }
</style>
删除 src/components/HelloWorld.vue 文件,如下图所示:

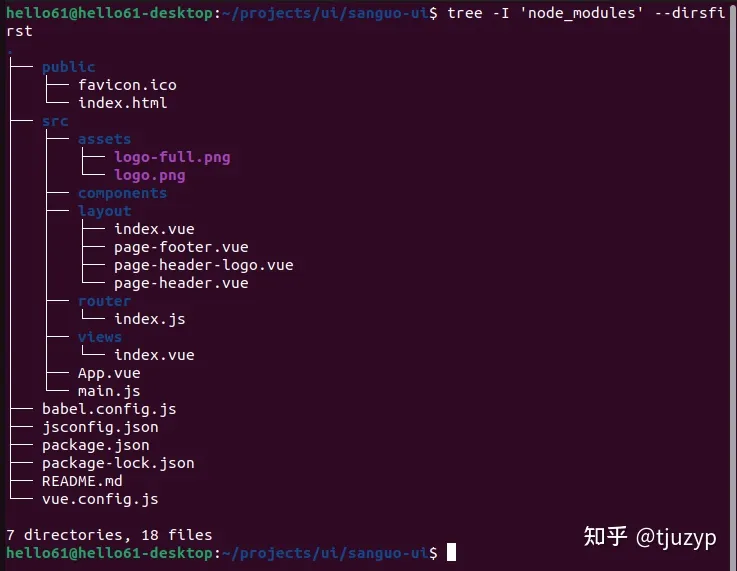
此时项目整体目录结构如下图所示:

启动项目
启动项目前先执行下方命令安装依赖:
npm install
如果没有报错,则说明项目已经可以正常启动,执行下方命令启动:
npm run serve
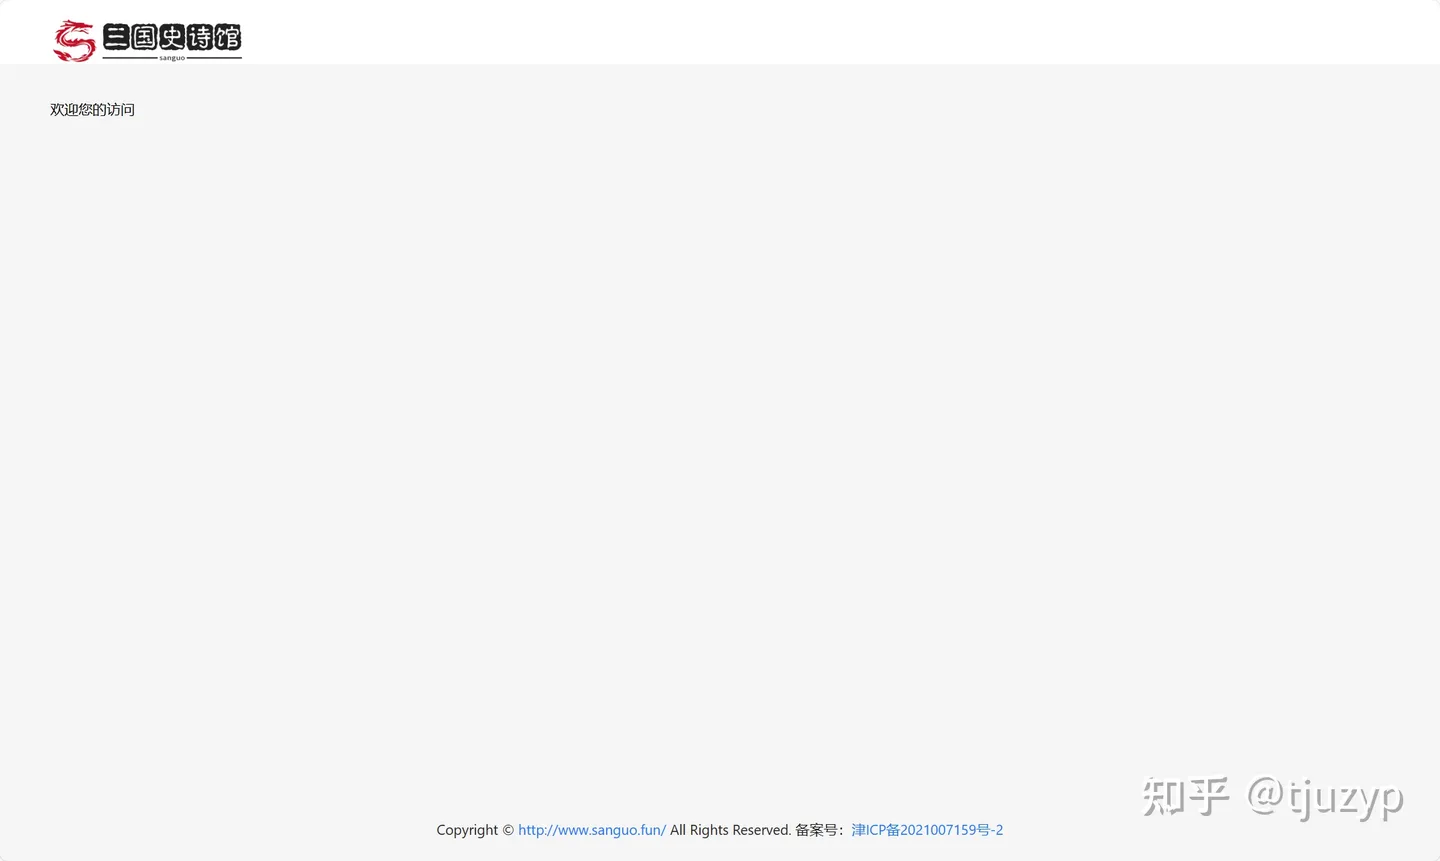
项目启动成功后打开查看,现在的页面如下图所示:

本篇文章到这里就结束了,欢迎关注后续更新。
