本系列文章适用于前端开发初学者,我将从环境搭建开始,逐步介绍如何开发一个基于 Vue 3.x & Ant Design Vue 4.x 的网站,如果哪位朋友发现其中存在技术错误或其他不当之处,请及时�指出,如果有任何疑问或需要帮助,也可以在评论区留言,我将尽我所能一一解答,谢谢。
本篇文章将介绍如何添加网站的加载等待动画、页面水印与编辑信息脚注。
- 当网站所在服务器的性能较差、网络带宽较低或其他技术原因导致网站的加载速度变慢时,加载动画能在一定程度上提高用户体验
- 页面水印可以在一定程度上增加页面的美观性,然而,过度使用或不当使用水印也可能引起用户的反感,常见的目的是用来保护版权和防止内容被未经授权地复制或分发
- 编辑信息脚注标识了内容的最后更新者与更新时间,它的主要作用是提供对页面中内容的补充说明
本篇文章我将结合三国史诗馆网站的页面优化进行介绍,代码实现较简单,主要考验的是审美,一不小心便会画蛇添足。
加载等待动画
加载等待动画等待的是什么?它常用于等待页面网络请求、处理数据、渲染组件及其他异步操作。
它的作用域包括页面整体等待、页面局部等待及组件自身等待等。
它的实现方式也多种多样,可以使用 setTimeout() 函数延迟加载、使用 jQuery 的 $(document).ready()、使用 window.onload()、使用 css 变换 display 元素、使用 loading 动画……
这次我介绍的是使用 loading 动画实现页面的整体等待,它是最基础最普遍的一种应用场景。
在 Vue 项目中,我们可以看到以下三段与此相关的代码:
- 页面入口,创建 id="app" 的 div 元素
...
<body>
    <div id="app" />
</body>
- 定义应用主程序,使用路由
<template>
    <router-view/>
</template>
...
- 创建并启动应用主程序
...
// 引入主程序
import App from './App.vue';

// 创建应用
const app = createApp(App);
...
// 启动
app.mount('#app');
在上述代码中,app.mount('#app') 是将 Vue 应用挂载到具有 id 为 "app" 的 <div> 元素上,这意味着当执行该代码时,Vue 应用将替换 <div id="app" /> 元素的内容。
所以,我们可以在 <div id="app" /> 中增加一个动画,就实现了等待时显示、加载后销毁,代码如下:
...
<link rel="stylesheet" href="/loading.css"/>
...
<div id="app">
    <div class="fantastic-admin-home">
        <div class="loading">
            <div class="square"></div>
            <div class="square"></div>
            <div class="square"></div>
            <div class="square"></div>
        </div>
        <div class="text">服务器性能有限, 请耐心等待</div>
    </div>
</div>
...
以上代码是使用 css 画了一个动画,css 代码如下:
#app {
    height: 100%;
}

.fantastic-admin-home {
    position: absolute;
    z-index: 10000;
    top: 0;
    left: 0;
    height: 100%;
    width: 100%;
    display: flex;
    align-items: center;
    justify-content: center;
    flex-direction: column;
    user-select: none;
    color: #736477;
    background-color: snow;
}

.fantastic-admin-home .loading {
    height: 40px;
    width: 40px;
    display: flex;
    align-items: center;
    justify-content: center;
    flex-wrap: wrap;
}

.fantastic-admin-home .loading .square {
    display: flex;
    align-items: center;
    justify-content: center;
    height: 20px;
    width: 20px;
}

.fantastic-admin-home .loading .square::before {
    content: "";
    width: 10px;
    height: 10px;
    border-radius: 15%;
    border: 3px solid #8c858f;
    animation: square-to-dot-animation 2s linear infinite;
}

.fantastic-admin-home .loading .square:nth-child(1)::before {
    animation-delay: calc(150ms * 1);
}

.fantastic-admin-home .loading .square:nth-child(2)::before {
    animation-delay: calc(150ms * 2);
}

.fantastic-admin-home .loading .square:nth-child(3)::before {
    animation-delay: calc(150ms * 3);
}

.fantastic-admin-home .loading .square:nth-child(4)::before {
    animation-delay: calc(150ms * 4);
}

@keyframes square-to-dot-animation {
    15%,
    25% {
        border-radius: 100%;
        width: 0;
        height: 0;
        margin: 5px;
        border-width: 5px;
    }

    40% {
        border-radius: 15%;
        width: 10px;
        height: 10px;
        margin: initial;
        border-width: 3px;
    }
}

.fantastic-admin-home .text {
    position: relative;
    font-size: 18px;
    margin-top: 20px;
}

.fantastic-admin-home .text::after {
    content: "....";
    position: absolute;
    padding-left: 1px;
}
效果如下:

页面水印
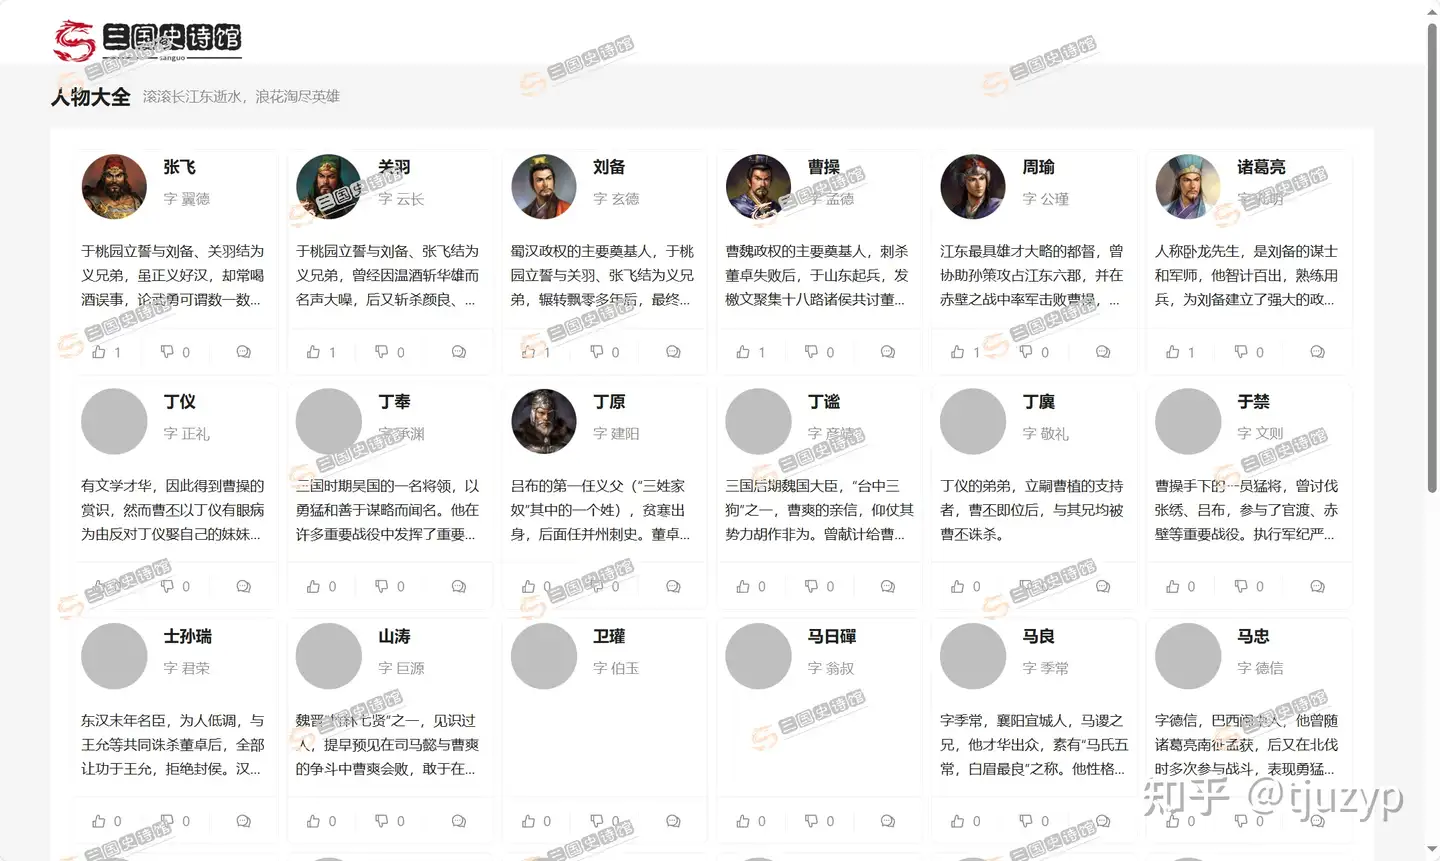
页面水印是指在网页背景上添加的特定的文字/图案,它通常是半透明的形式,或者颜色非常浅,对网页原始内容的可读性不造成影响。
使用 Antdv 框架时,添加水印很容易,它已经帮我们封装好了,只需要在页面元素最外层增加 a-watermark 即可,代码如下:
<template>
    <a-watermark :height="30" :width="130" :image="require('@/assets/logo-full-watermark.png')">
        // 原 a-layout 代码段
        ...
    </a-watermark>
</template>
...
效果如下:

编辑信息脚注
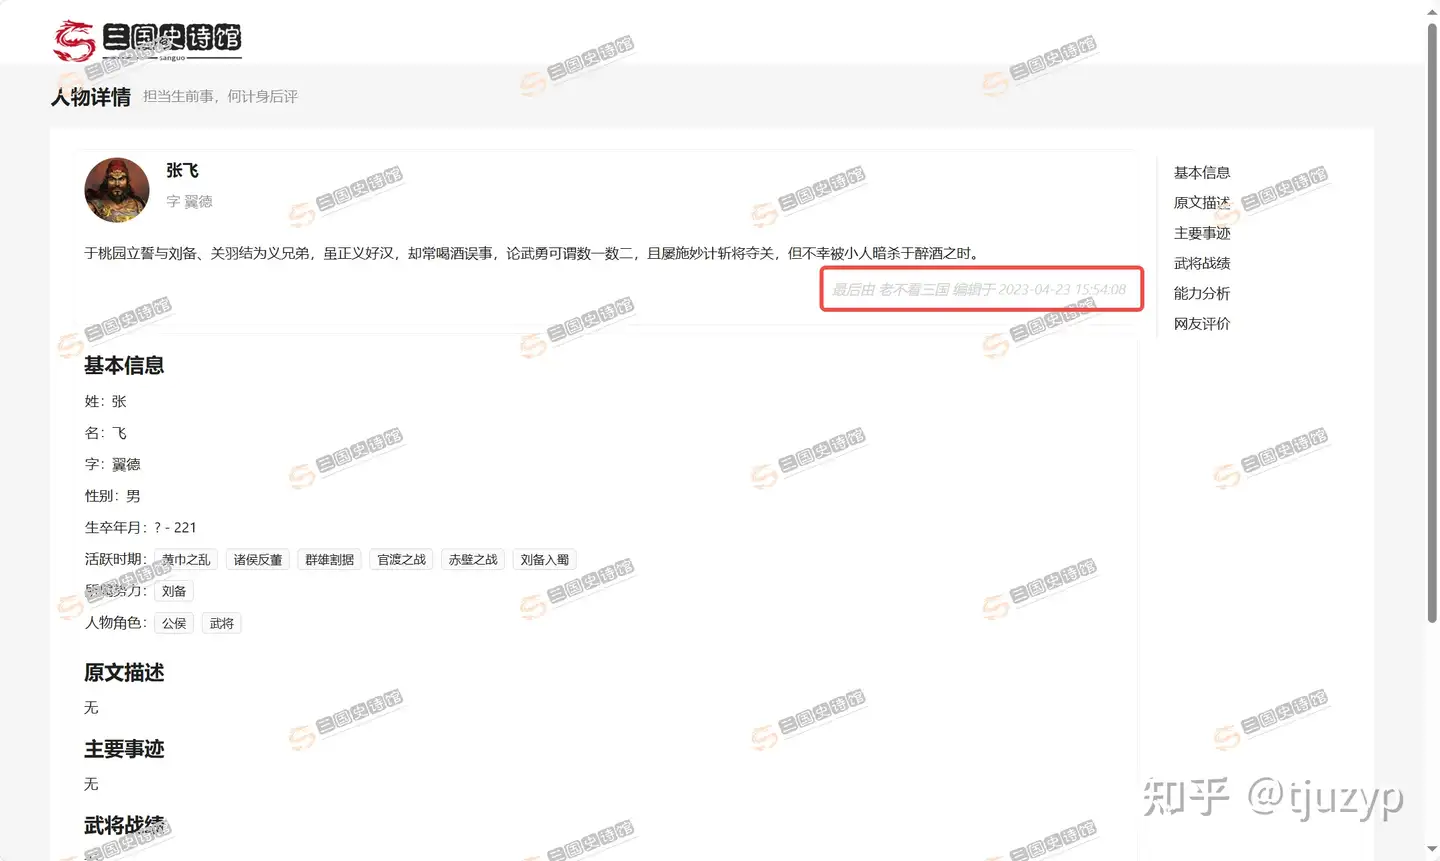
编辑信息脚注是我随便起的一个名字,它用于在一段内容的结尾处标记最后编辑信息,实现方式各种各样,我只用了最直接的一行代码,如下所示:
...
<p class="editInfo">最后由 xxx 编辑于 xxx</p>
...
.editInfo {
    float: right;
    color: lightgrey;
    font-style: italic;
}
效果如下:

总结
页面设计时尽量少加花里胡哨的东西,它会影响页面要展示的主体内容,也容易引起用户的反感。
本篇文章到这里就结束了,欢迎关注后续更新。
